Italian Plum Pie

italian plum pie | apt 2b baking co
italian plum pie-0610.jpg
italian plum pie | apt 2b baking co
italian plum pie-0613.jpg
italian plum pie | apt 2b baking co

There's a new kid in town, and by kid in town, I mean almost 12 week old maniac puppy in my house. I posted on instagram yesterday that he was 10 weeks old, but when we actually sat down with a calendar this morning we realized he was 12 weeks, not even close to 10.

We have been in a weird time vacuum this summer- busy and traveling at first, and now trying to settle back into a new routine and trying to teach this puppy to sleep in his new home and be a good citizen. NYC is a loud smelly place and our sweet pup is learning to love it more and more everyday, even if it is overwhelming - a 20 minute hang on the stoop is stimulating enough to send him straight to a 2 hour nap. Me too pup, me too. This city is tiring. 

Some friends of ours, I've mentioned a couple of times, decamped Brooklyn for the Pacific Northwest and moved to a house with a hearty rhubarb plant, alongside an Italian plum, and hazelnut tree. Pete joked that their new yard makes it's own trailmix, a very Northwestern ideal.

Apparently that plum tree is an excellent producer of the most beautiful deep-blue purple plums with orangey centers, and our generous pal sent me a box full that I sadly haven't had much time to play with because of aforementioned pup that requires hourly monitoring...But yesterday I said enough is enough - I need to bake something with these plums! As I sliced them open I smiled  at the perfectly contrasting colors and was so happy to be hanging in the kitchen with a peacefully snoozing pup in the other room. 

It was a bit slap-dash as all of my pies are these days. I use my new fave easiest pie crust ever, but swapped in 1/2 rye flour for the all purpose, and employed my general prefered fruit pie formula - adjusted it a bit to suit the fruit. 

Italian Plum Pie

makes one, 9-inch pie

Plum pie is my very favorite summer-to-fall transitional treat. Italian plums are so perfectly suited to cooking and baking that I can't resist them at the market everytime I go. They pair well with both bright citrusy flavors and deeper toastier ones like whole grain flours and warm spices like cinnamon.  In a moment of Four and Twenty Blackbirds inspiration, I shook a bottle of cardamom bitters into the filling which ended up being a totally delicious move, which I highly recommend if you happen to keep a bottle in your bar. If not, a bit of ground cardamom is great too.

2 1/2 times Easiest Pie Crust Ever, split into two discs (sub 1/2 of the all purpose flour for rye)

2 lbs (900g) Italian plums

1/2 cup (100g) light brown sugar

seeds of 1/2 vanilla bean or 1/2 teaspoon vanilla extract

1/4 cup (30g) flour

1/4 teaspoon cinnamon

5 shakes/dashes cardamom bitters or 1/2 teaspoon cardamom

pinch salt

Preheat the oven to 400º F and place a rack in the bottom of the oven. In a large bowl combine the sugar and vanilla bean seeds. Use your fingers to rub the and seeds into the sugar until well combined and fragrant. Stir in the flour, cinnamon, and salt.

Pit and cut the plums into quarters. Add them to the bowl but don't stir quite yet.

On a lightly floured surface, roll out one piece of the dough into a roughly 12-inch circle about 1/8-inch thick and place it into a 9-inch pie pan. Place in the fridge while you prepare the rest of the pie. Roll out the other piece of dough into a roughly 12-inch circle, about 1/8-inch thick.

Add the bitters to the filling, then gently stir the filling ingredients together. Fill the pie shell, press gently to compact the fruit, and top with the second crust.

Trim the edges so they are even, then crimp them together. Alternately, cut the second crust into 1 1/2 to 2-inch strips and weave a lattice top.

Slide the whole pie into the fridge or freezer for about 15 minutes or until the crust is very firm. When you are ready to bake, carefully and gently brush the top of the pie with a beaten egg and sprinkle with a healthy dose of coarse sugar.

Put the pie on a baking sheet to catch any drips and bake for 45-55 minutes or until the crust is deep golden brown and the juices bubble. Cool before slicing.

Edible Holiday Gift guide 2015

christmas cookies  | apt 2b baking co
shop ila black salt caramels | apt 2b baking co
christmas cookies  | apt 2b baking co

Hi guys! I wasn't planning on posting my holiday treats this year, but lots of you fine people asked for the recipe for the pistachio shortbread with cardamom and cacao nibs that I posted on Instagram (the second photo above) so here I am! I got pretty serious with my edible gifts this year because I had to make up for a so-so 2014. Links and recipes are below! 

Pistachio Shortbread with Cardamom and Cacao Nibs (recipe below)

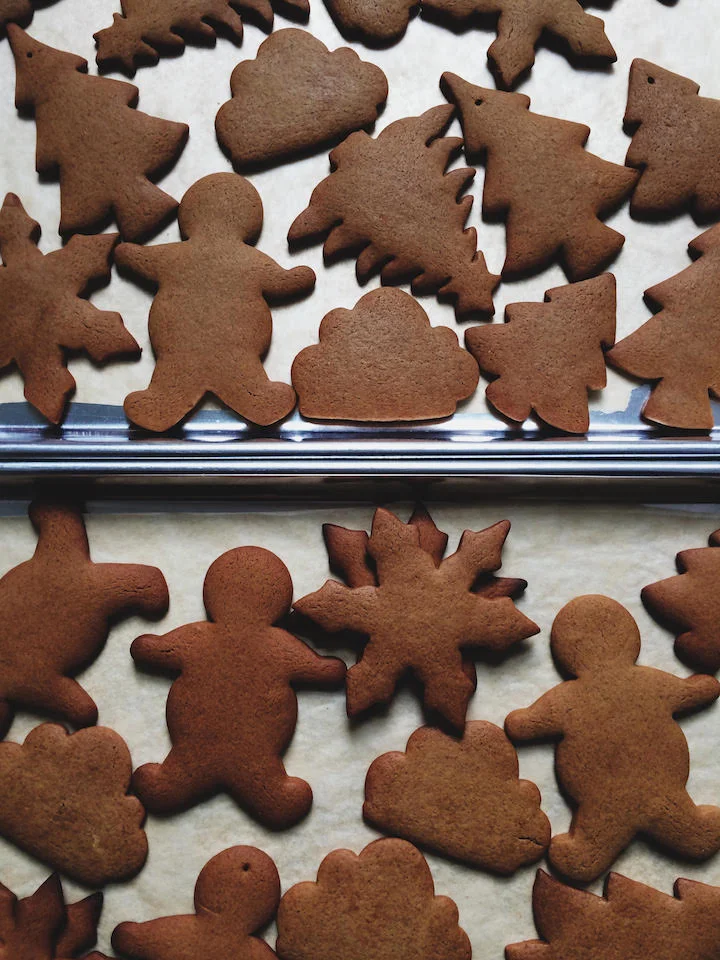
My favorite Gingerbread with Royal Icing (recipe below)

Tartine's Salted Chocolate Rye Cookies

Alice Medrich's Buckwhat Cookies with Cacao Nibs

Soft Salted Caramels (shown with Shop ILA's Black Lava Salt)

Violet Bakery's Rye and Chocolate Brownies (inspired by Tartine's Cookies!)

Rosemary Spiced Nuts

Follow me on instagram for more holiday baking fun @yossyarefi and check out Melissa's post for even more edible gift ideas!


Pistachio Shortbread with Cardamom and Cacao Nibs

makes about 30 cookies

2 cups all purpose flour

3/4 cup unsalted, shelled pistachios

3/4 cup granulated sugar

3/4 teaspoon cardamom

1/2 teaspoon salt

1 cup unsalted butter, cold and cut into chunks

2 teaspoons vanilla extract

1/3 cup cacao nibs

Combine the flour, pistachios, sugar, cardamom, and salt in the bowl of a food processor and pulse until the pistachios are finely ground. Add the butter and pulse until the mixture looks damp and crumbly. Drizzle in the vanilla extract, then add the cacao nibs. Pulse a few more times until the dough begins to just hold together.

Remove the dough from the food processor and knead a few times until the dough is evenly mixed and holds together. Wrap the dough in plastic wrap and chill for 2 hours or overnight.

Preheat oven to 350ºF and line two baking sheets with parchment paper.

Roll the dough on a lightly floured surface to a 1/4-inch thickness and cut into shapes as desired. Place the cut cookies onto the prepared sheets 1-inch apart. Reroll the dough scraps until all of the dough is used. Chill the cut cookies for 10 minutes before baking. If at anytime the dough gets warm and is difficult to work with, transfer it to the fridge for a few minutes.

Bake the cookies until light golden around the edges, 12-14 minutes. Let cookies cool on the pans for a few minutes then transfer to a rack to cool completely.


Gingerbread Cookies with Royal Icing

makes about 3 dozen cookies, depending on size

3 1/4 cup all-purpose flour

3/4 teaspoons baking soda

2 teaspoons ground ginger

2 teaspoons ground cinnamon

1/4 teaspoon finely grated nutmeg

1/4  teaspoon finely ground black pepper

1/4  teaspoon ground cloves

1⁄4  teaspoon allspice

1/2 teaspoon orange zest

1/2 teaspoon salt

14 tablespoons unsalted butter, softened

1/2 cup packed dark brown sugar

1 large egg

1/2 cup unsulfured molasses

In a large bowl, whisk the flour, baking soda, salt and spices together.

In a stand mixer, cream the butter and sugar together until light and fluffy. Add the egg, then the molasses and mix until well combined. With the mixer on low speed, gradually add the flour mixture and mix until thoroughly combined. Divide the dough in half, wrap each half in plastic and refrigerate for at least one hour before rolling.

Preheat oven to 350ºF and line two baking sheets with parchment paper.

Working with 1/2 of the dough at a time roll the dough 1/8-1/4-inch thick on a lightly floured surface using a lightly floured rolling pin roll. Use a cookie cutter or stencil to cut out desired shapes then place them on the prepared baking sheets. For cookie ornaments, use a skewer to poke a hole through the top of the cookies before baking. Bake for 8-10 minutes or until the edges of the cookies have just barely begun to brown. For cookie ornaments bake the cookies until they are lightly browned all over and firm to the touch. Cool the cookies on the sheet pans for a few minutes and then transfer to a cooling rack to cool completely. Decorate as desired.

Royal Icing

1 egg white

1⁄2 teaspoon lemon juice

1 3⁄4 cup confectioners sugar

Combine all of the ingredients and beat with a hand mixer (or in a stand mixer) until stiff peaks form. If the icing seems too thick, add a few drops of water or lemon juice. If it seems runny, add a few table- spoons of confectioner’s sugar.

Use a pastry bag fitted with a #2 or #3 round tip and the stiff icing to add lines, shapes and dots to your cookies. Sprinkle with colored sugar, sprinkles or nonpareils if desired, just make sure to do it while the icing is still wet.

To make the cookies into ornaments, thread a string through the hole and tie it to make a loop.

christmas cookies  | apt 2b baking co