Molly's Scallion Pancake Challah
/We are having another quiet weekend around these parts, complete with lots of lounging on the couch, and cozy eats. We also just got back from a SUPER fun road trip to Virginia that I can't wait to tell you about, spoiler alert - we ate a lot of good food and saw a lot of beautiful things, and Arlo is an excellent road trip companion - but after almost a week on the road, I was ready to get back to my own kitchen. This weekend's dreary weather really kicked me into action. I made baked pasta with bolognese for dinner last night, and then not so accidentally fell asleep on the couch at about 9:30. This is my 30s guys, what can I do? I love an early bedtime.
Another great thing about getting back from the road was that I have been cooking from the killer new fall cookbooks that have been stacking up on my coffee table. If you've been on the internet lately, I'm sure you've heard of the gorgeous book, Molly on the Range, by my my pal Molly Yeh, creator of the award-winning blog My Name is Yeh. It is so delightful, and so very Molly. From the fun recipes that reflect her Chinese-Jewish heritage to the adorable illustrations, thoughtful writing, and beautiful minimal photography, this book is a perfect extension of the work that Molly does on her blog and such a delight to flip through!
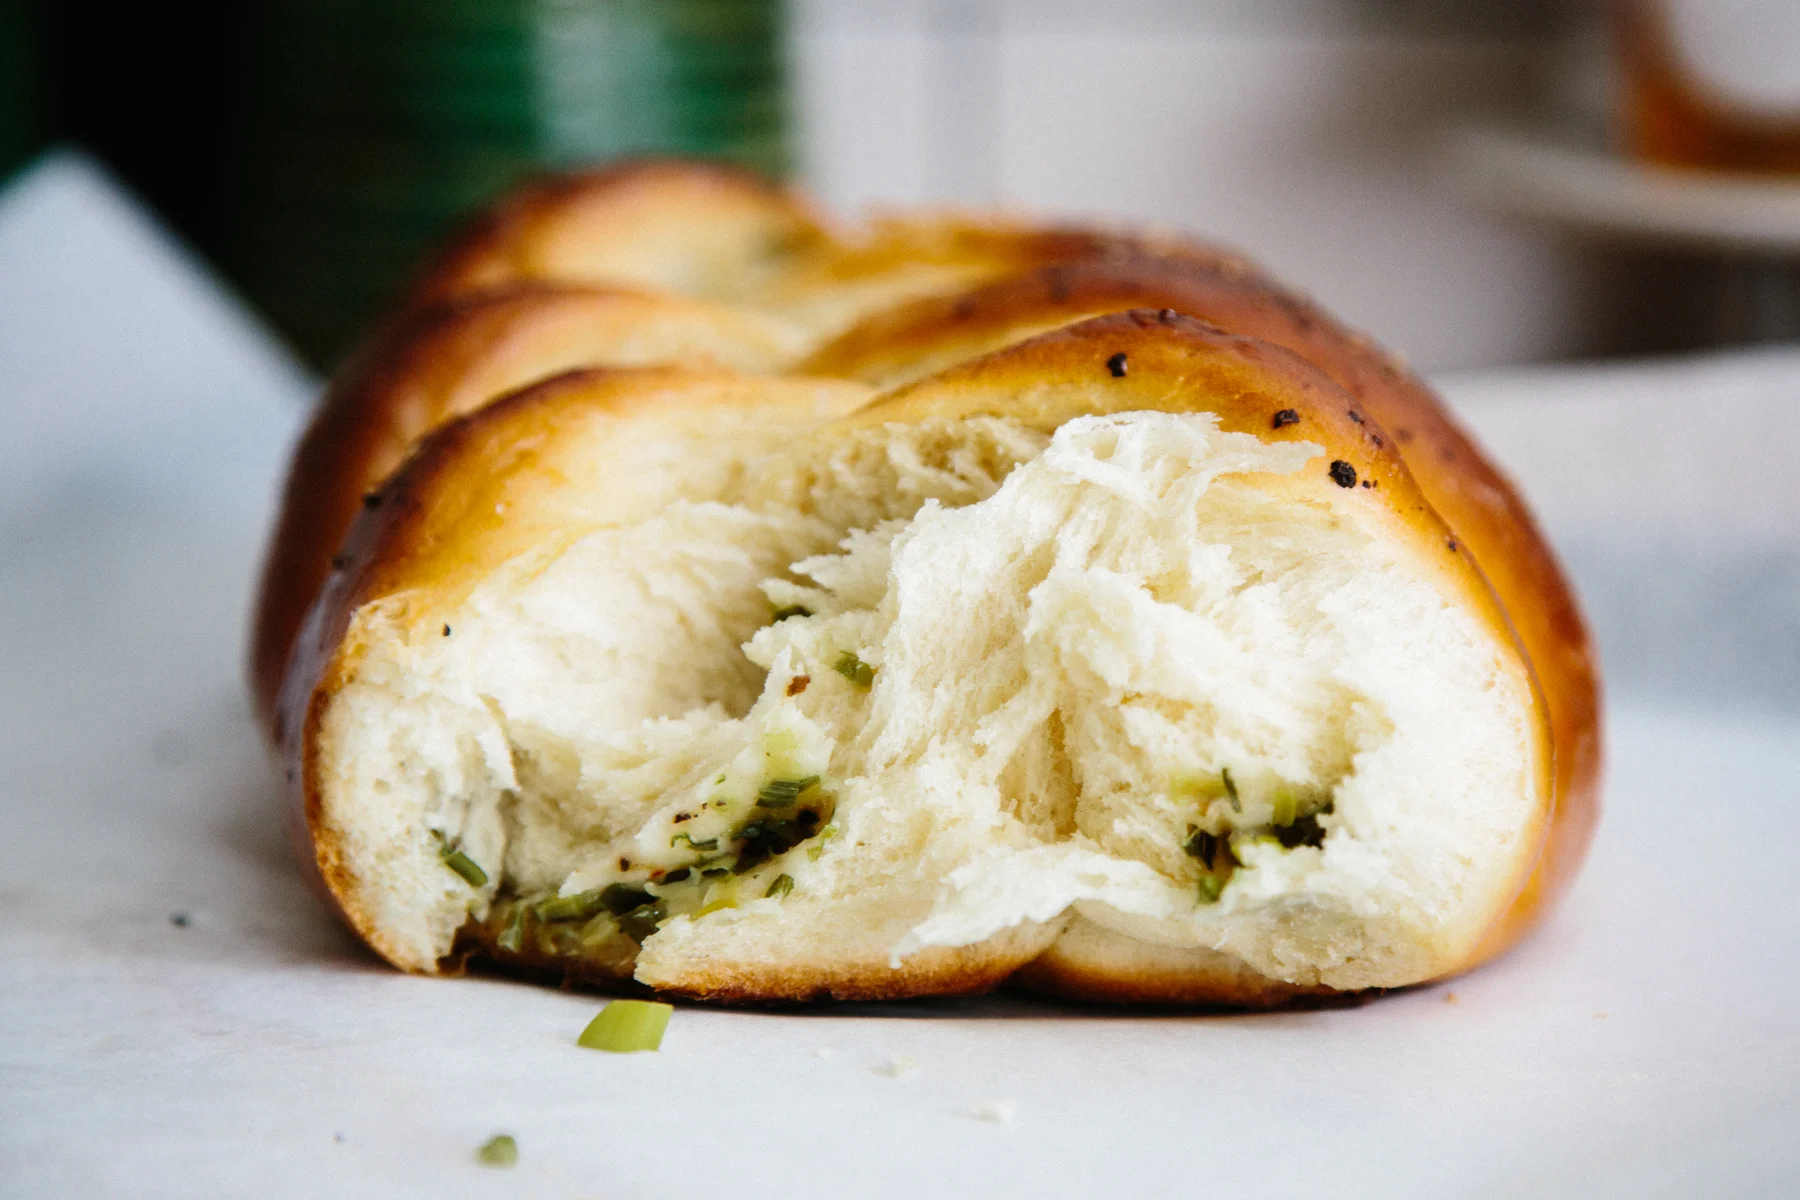
Molly said this recipe is basically her in bread form - Chinese, Jewish and a pretty doughy. We attacked the warm loaf with our hands and ate about half of it in one go, then enjoyed the rest with eggs for breakfast which I think would be very Molly approved. The recipe only calls for a 1/2 recipe of dough, but I figured I could find a home for a second loaf of challah so I went for it and made the whole recipe - half plain and half scallion. You should too! Molly also gives lots of other fun suggestions of what you can do with challah dough in the book. It also calls for sprinkling the dough with sesame seeds, but I was out when I went to make this...it is much cuter with sesame seeds on top :)
SCALLION PANCAKE CHALLAH FROM MOLLY ON THE RANGE
makes one loaf
from Molly on the Range
1/2 recipe dough from Basic Challah (recipe follows), made through the first rising
1 tablespoon toasted sesame oil
3 scallions, minced
Kosher salt and black pepper
Crushed red pepper
Egg wash: 1 large egg yolk, beaten with
1 tablespoon water
Toasted sesame seeds
Preheat the oven to 375°F. Line a baking sheet with parchment paper.
Divide the dough into 3 equal parts and roll each part into a 12-inch log. Gently flatten each log so that it is about 3 inches wide. Brush each with sesame oil and sprinkle with scallions, salt, black pepper, and crushed red pepper. Roll the logs up lengthwise like a jelly roll and pinch the seams to seal. Lay the logs seam side down next to one another and pinch them together at one end. Then braid the logs and pinch them at the other end. Place the loaf on the lined baking sheet. Cover and let rise for 30 minutes.
Brush the loaf with the egg wash and sprinkle with sesame seeds and black pepper.
Bake until the loaf is golden brown and has an internal temperature of 190ºF. Begin checking for doneness at 28 minutes. Let cool slightly and enjoy.
MOLLY'S BASIC CHALLAH
from Molly on the Range
Makes 2 loaves
4 ½ teaspoons (2 envelopes)
active dry yeast
1 ½ cups warm water
1 teaspoon plus ¼ cup sugar
6 ½ cups flour, plus more for dusting (or sub in up to 2½ cups whole wheat flour)
2 teaspoons kosher salt
4 large eggs
⅔ cup flavorless oil
¼ cup additional sweetener: sugar, brown sugar, honey, or molasses
Egg wash: 1 large egg yolk beaten with 1 tablespoon water
In a medium bowl, combine the yeast, warm water, and 1 teaspoon of the sugar and give it a little stir. Let it sit for about 5 minutes, until it becomes foamy on top.
Meanwhile, in a large bowl or in a stand mixer fitted with the dough hook, mix together the flour, salt, and remaining ¼ cup sugar. In a medium bowl, whisk together the eggs, oil, and additional sweetener.
When the yeast is foamy, add it to the dry mixture immediately followed by the egg mixture and stir to combine. Knead, either by hand on a floured surface or with the dough hook until you have a smooth and slightly sticky dough, 7 to 10 minutes, adding more white flour as necessary (but resist any urge to add too much!).
Transfer the dough to an oiled bowl, cover it with plastic wrap or a damp kitchen towel, and let it sit at room temperature until it has doubled in size, about 2 hours. (It will take slightly longer if you’re using whole wheat flour.) Alternatively, you can stick it in the refrigerator overnight and then let it sit at room temperature for about 1 hour before shaping.
Line two large baking sheets with parchment paper. Divide the dough in half and, working with half of the dough at a time (keeping the other half covered), pat the dough out into a long rectangle, roughly 3 inches by 12 inches (this doesn’t need to be exact). From this, cut 3 long and skinny rectangles and roll them out a bit to get 3 long snakes. Pinch them together at one end and then braid the snakes and pinch them at the other end. Transfer the loaf to a baking sheet and repeat with the remaining half of the dough. Let them rise, covered, at room temperature for 30 minutes.Preheat the oven to 375º F.
Brush the loaves with a thin even layer of egg wash and sprinkle with sea salt. Bake until the loaves are golden brown and have an internal temperature of 190ºF. Begin checking for doneness at 28 minutes.
Let the loaves cool until they’re jusssst cool enough that they won’t burn your mouth, and then enjoy with lots of butter.


