Rhubarb and Apple Tart
/

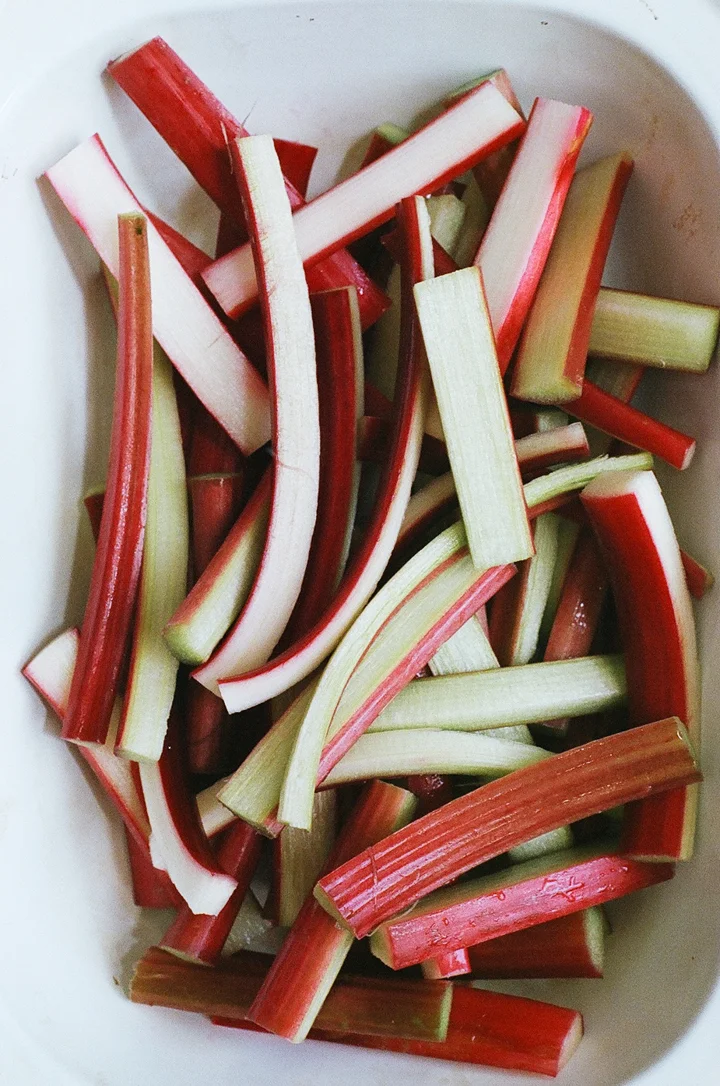


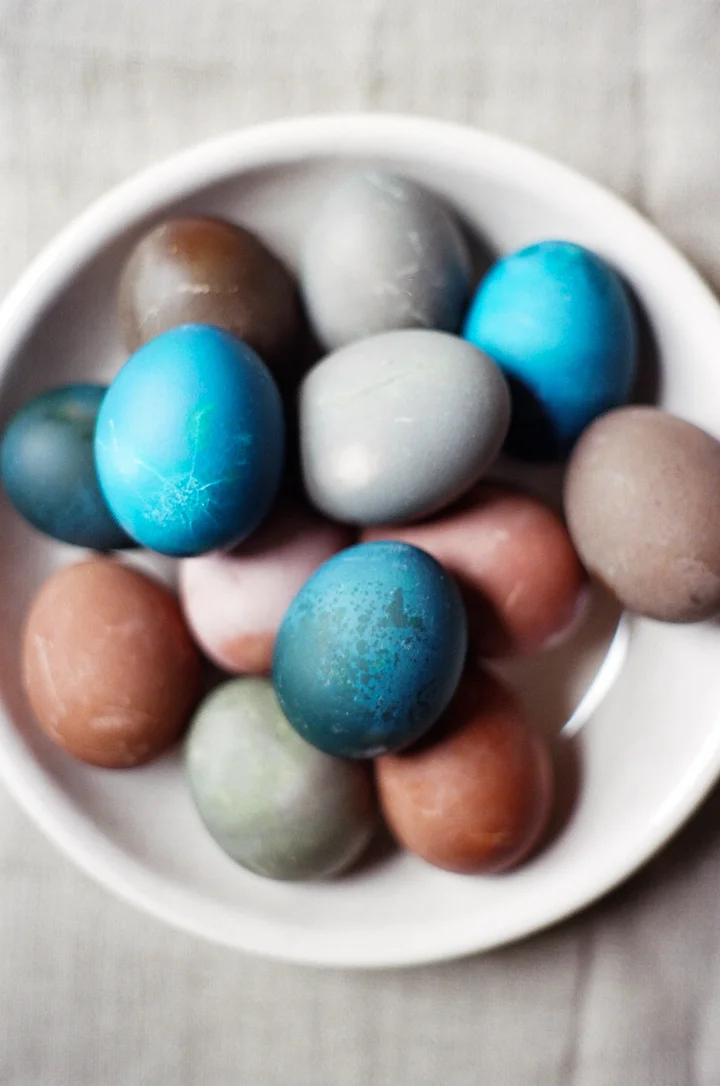
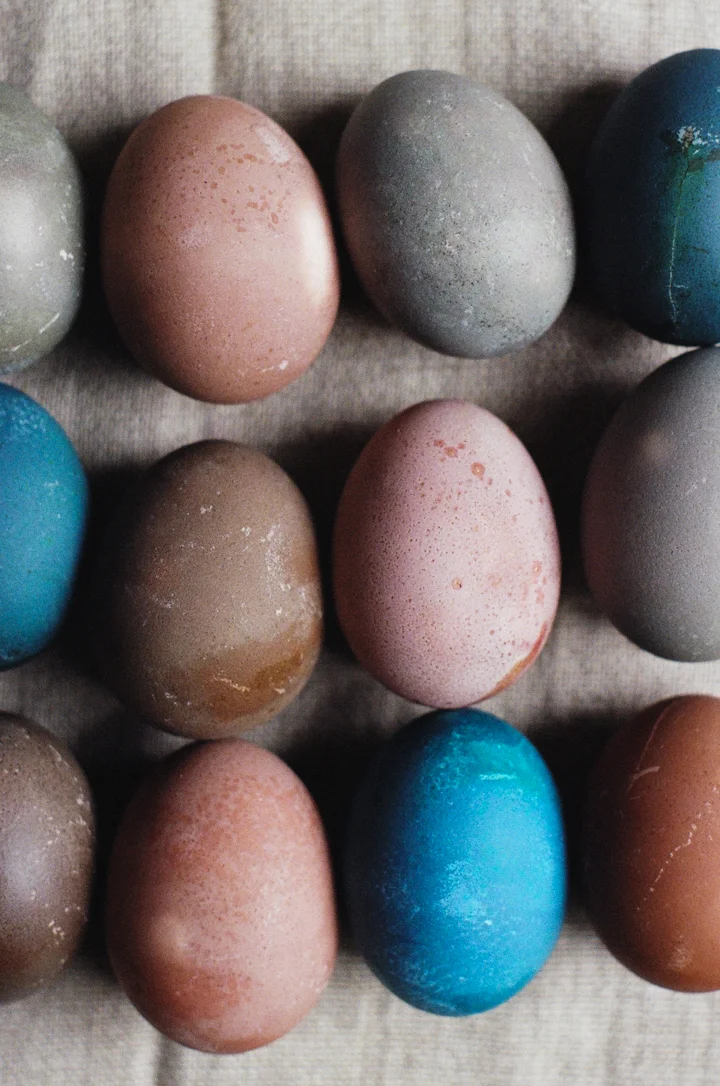
I went to Seattle last week to visit family a couple of weeks ago where there was a birthday party for my littlest niece and I made two cakes...because first birthdays call for lots of celebration. She smiled and clapped as we sang Happy Birthday, and even tried to blow out the candle herself, adorable. Seattle was green and lush, my parents backyard chickens were in full on laying mode, trees popped with blooms, and there were plenty of signs of spring at the market. I ate a perfect cheeseburger from my favorite place that serves their sodas with pellet ice, the best ice. We went to the Ballard farmer's market on my last day in town and I almost bought a little rhubarb start to bring back and try to grow, but settled for a suitcase of Washington grown rhubarb stalks instead. I could see the TSA agents furrow their brows as my bag went through the X-ray machine, probably wondering what kind of crazy person would bring what looked like celery stalks on an airplane.
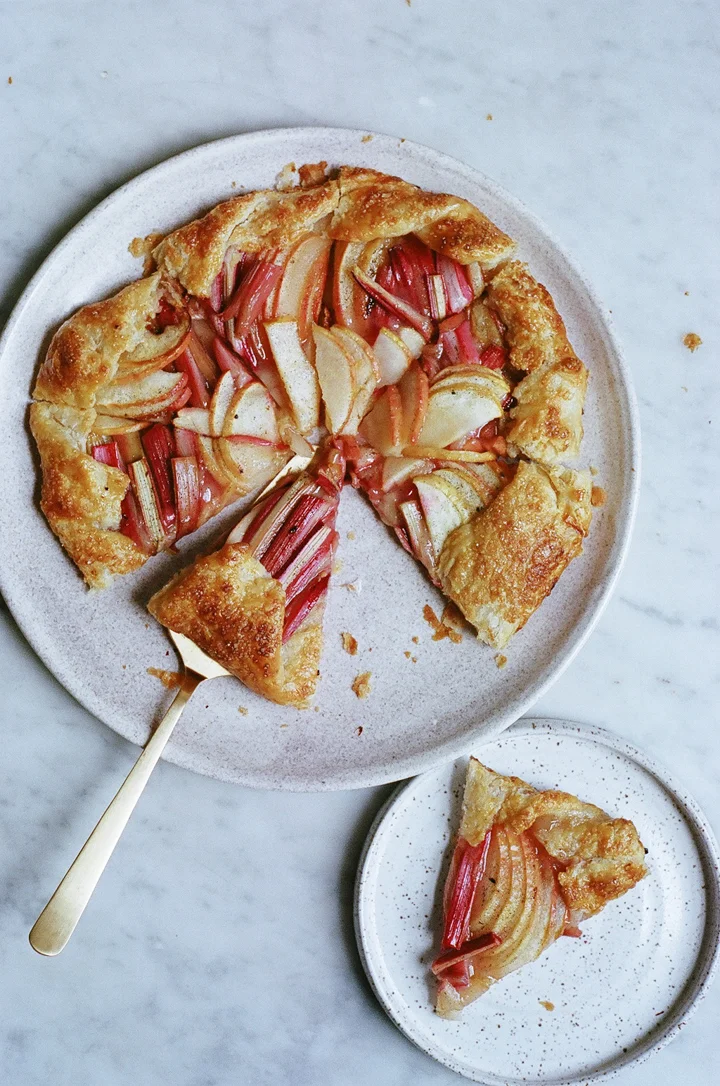
Back in NY, we are still waiting for full-on Spring. Last week brought a few sunny warm days and there are finally little leaf buds on the trees outside of my kitchen window. There are !OMG RAMPS! at the Greenmarket, but it will be quite awhile before we get any real fruit. The combination of rhubarb and apples is perfect for this time of year, when the pickings are still slim, but there are still delicious apples and rhubarb (smuggled or otherwise) to work with. I've said it before, but galettes are my favorite type of tart: loose, messy, and fun. I like to bake galettes super dark so the bottom crust gets crispy enough that you can hold a slice like a piece of pizza and eat it with your hands. Dessert pizza, it's happening.
Rhubarb and Apple Tart
This is a perfect tart for early Spring. Sweet vanilla mellows the tart bracing flavor of rhubarb in such a lovely way I have a hard time cooking rhubarb without it. I used a huge honey crisp apple here, but you can use any baking apple you like. Also, any pie crust you like for this tart, I have included a link to my favorite below.
makes one 9-inch tart
1/2 recipe all butter pie crust or your favorite pie crust
8 ounces rhubarb
1 large baking apple, or 2 small ones
1/2 of a lemon
4 tablespoons sugar
1 tablespoon flour
1 vanilla bean
pinch salt
1 egg
1 tablespoon turbinado sugar
Line a baking sheet with parchment paper.
Slice the rhubarb into batons about 1/4-inch by 3-inches long. Slice the apple into thin slices, no need to peel it.
Use the tip of a knife to split the vanilla bean in half lengthwise and scrape out the seeds. In a small bowl combine the vanilla bean seeds and sugar. Use your fingers to rub the vanilla bean seeds into the sugar until well mixed. Save the vanilla bean pod for another use.
Roll out the pie crust to a 12-inch circle and transfer it to the parchment lined baking sheet. Sprinkle the flour and one tablespoon of the vanilla bean sugar over the top. Lay the apple slices and rhubarb batons over the sugar in a slightly overlapping layer in a decorative pattern, leaving a 2-inch border around the edge. Sprinkle the remaining sugar along with a pinch of salt evenly over the fruit. Squeeze the lemon over the fruit too.
Fold the excess dough over the fruit and press gently to seal the folds. Put the baking sheet in the freezer and freeze the tart until the dough is very firm, about 15 minutes. While the tart is chilling, preheat the oven to 400ºF and whisk the egg in a small bowl.
After the tart has chilled, brush the dough with the beaten egg and sprinkle with turbinado sugar. Bake the tart until deep golden brown, 35-45 minutes.